5 LexOPS Shiny App
The Shiny app is an interactive interface for LexOPS. The LexOPS Shiny app can be run locally with:
A demo of the Shiny app is available at https://jackt.shinyapps.io/lexops/, but running the app locally is recommended for reliability and speed.
5.1 Generate
The Generate tab is an interface for the “generate pipeline”. This allows you to generate stimuli for any possible factorial design.
5.1.1 Specify Design
Splits (independent variables), controls, and filters can be specified in the following way:
- Click the ‘+’ button to add a new variable.
- Choose a variable from the drop-down menu.
- Select a source for the variable if necessary (i.e. “according to…”).
- Specify the boundaries or tolerances
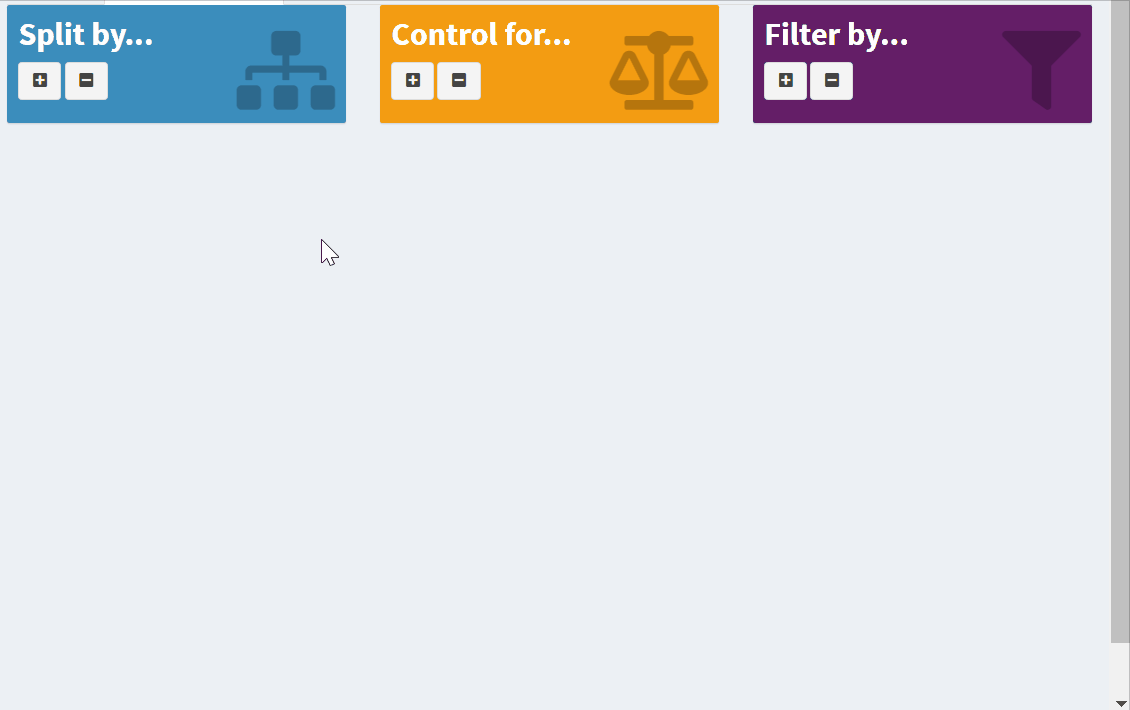
Figure 5.1: Specifying a design in the shiny app.
5.1.2 Options
Here you can tell the app how many stimuli should be generated per condition, which condition should be used as the match null, and which variables to include in the long-format version of the results.
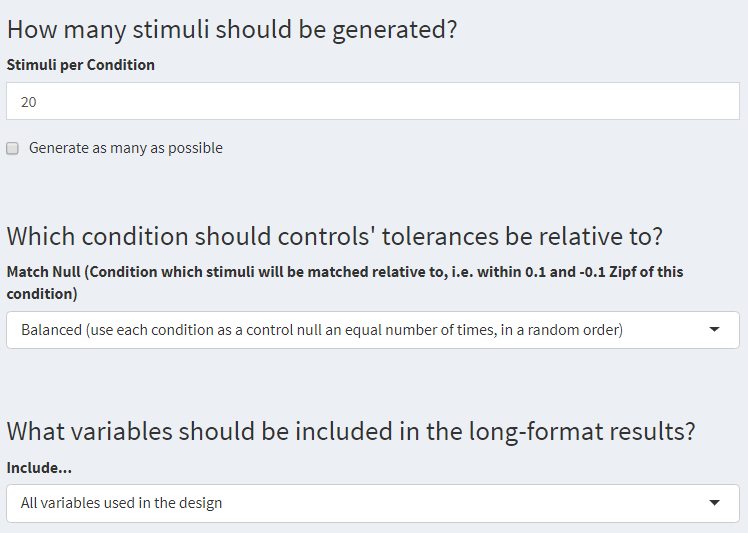
Figure 1.1: Options for the Generate tab.
5.1.3 Results
This is where you can see the generated stimuli. A different set of stimuli which fit the design will be generated each time the “Regenerate” button is clicked. You can switch between viewing the stimuli in wide or long format, and can download the stimuli in either format as a file: generated_stimuli.csv.
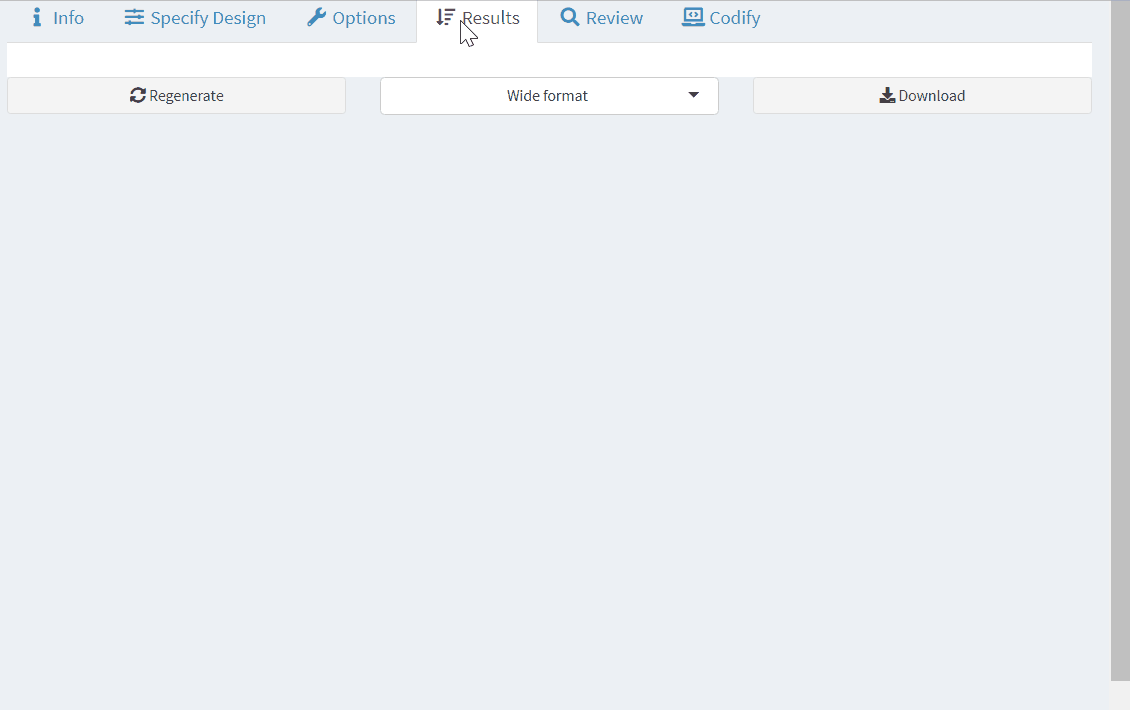
Figure 5.2: Generating stimuli and viewing the results.
5.1.4 Review
This section gives you a summary of the generated stimuli. You can view how splits, controls, and filters differ between conditions and across matched items (which calls the plot_design() function). You can also view the cumulative item generation (from the plot_iterations() function), and check the distribution of the match nulls.
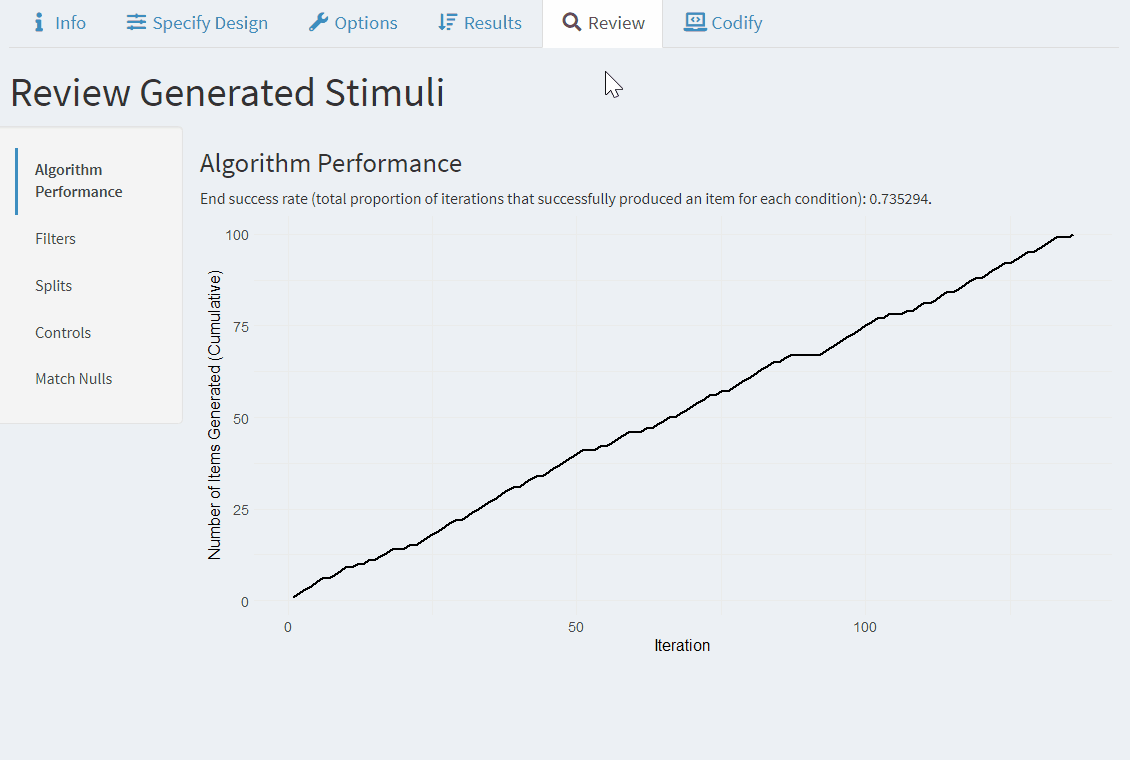
Figure 5.3: Reviewing generated stimuli.
5.1.5 Codify
This is a handy feature that lets you translate the selected options into LexOPS R code to reproduce the design. To reproduce a specific stimulus list, set the seed in the Preferences tab.
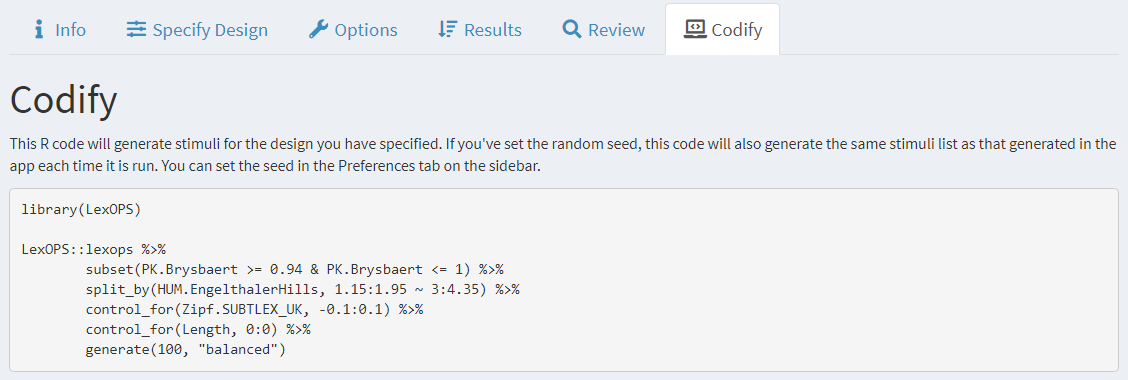
Figure 5.4: Translate selected options into LexOPS R code.
5.2 Match Item
The Match Item tab is a user interface for the match_item() function. As in the Generate tab, you can specify variables that should be matched by (with tolerances relative to the target string) and filtered by (with boundaries independent of the target string). You can then view and download the suggested matches.
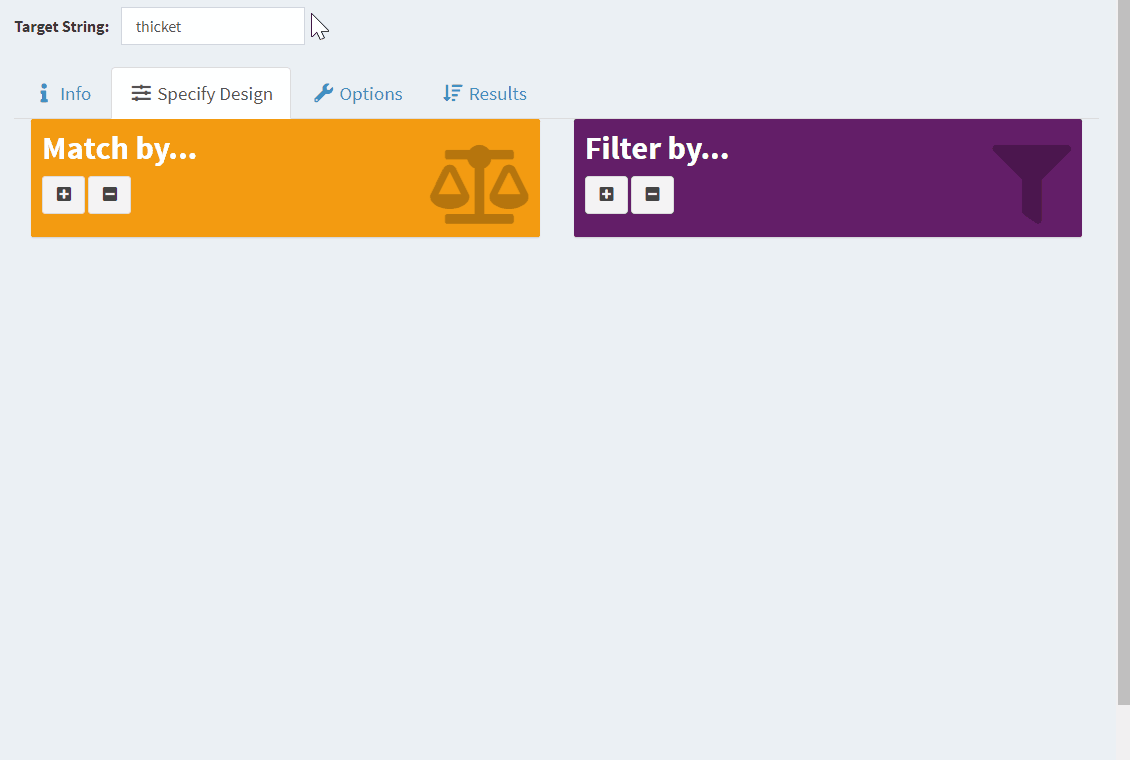
Figure 5.5: Matching individual words in the Match tab.
5.3 Fetch
The Fetch tab can be helpful for getting items from the LexOPS database (or uploaded in the Custom Variables tab) for your own list of words. As an example, I may have a file, my_stimuli.csv, containing the following:
| word | likert_rating | mean_RT |
|---|---|---|
| pigeon | 1.40 | 456.0 |
| dog | 5.20 | 423.5 |
| wren | 6.00 | 511.0 |
| symbiosis | 4.44 | 503.2 |
| shark | 4.20 | 482.3 |
I could upload this to the Fetch tab. This will return the known values from the LexOPS dataset for my list of stimuli:
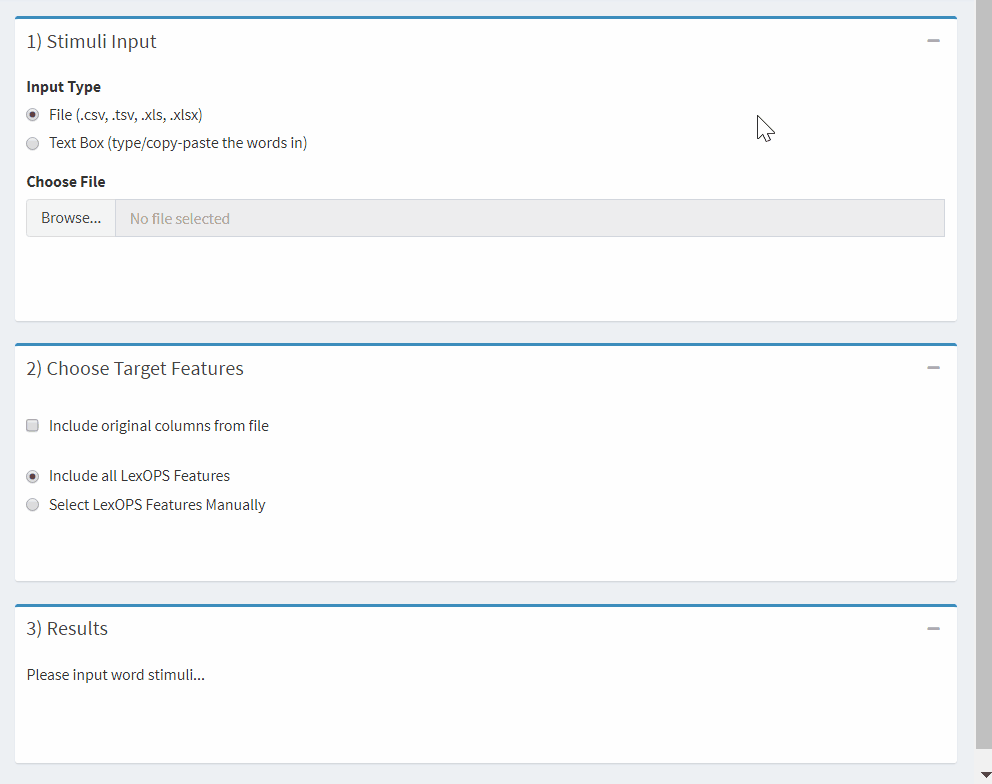
Figure 5.6: Fetching the features of a stimulus list.
5.4 Visualise
The Visualise tab provides options for plotting useful information. This includes variables from the LexOPS dataset, custom variables, and assigned factorial cells.
Here’s an example, showing stimuli generated in the Generate tab (in a Bigram Probability x Concreteness design). Points can be coloured (e.g., by generated condition) and individual items can be identified by hovering over the points.
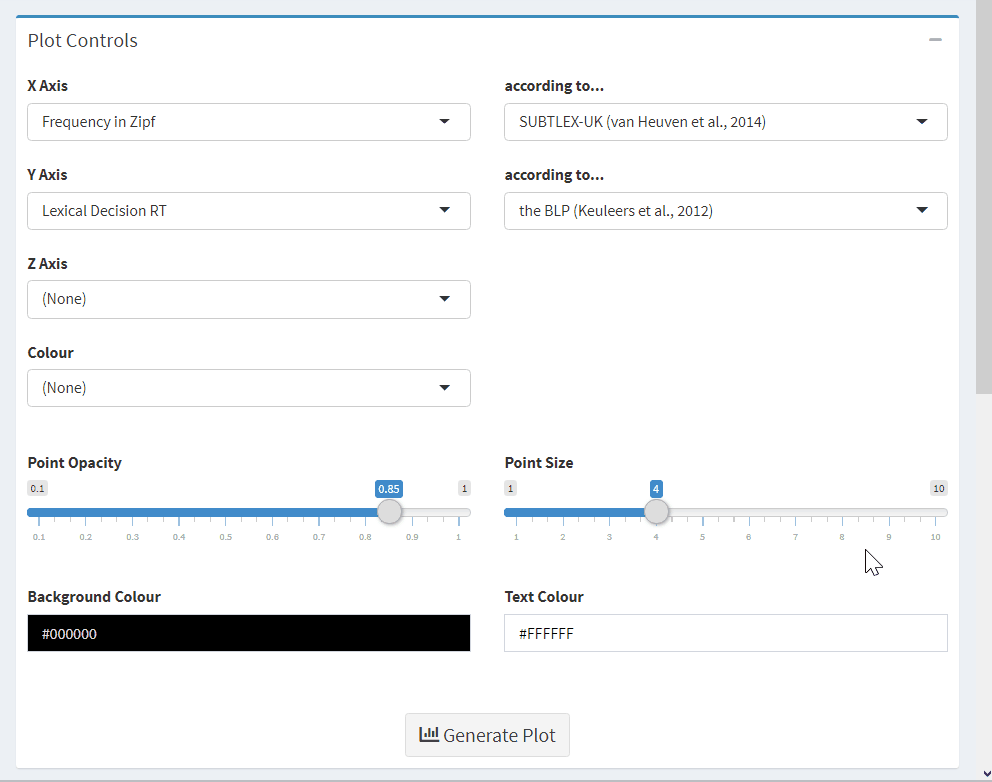
Figure 2.1: Example usage of the Visualise tab.
5.5 Custom Variables
The Custom Variables tab is useful for adding your own variables to the app to generate stimuli. Custom variables are only available for the current session.
Here is an example in which the variables from the Leipzig Affective Norms for German (LANG) (Kanske & Kotz, 2010) are added to the LexOPS shiny app. These variables can then be used in the Generate tab.
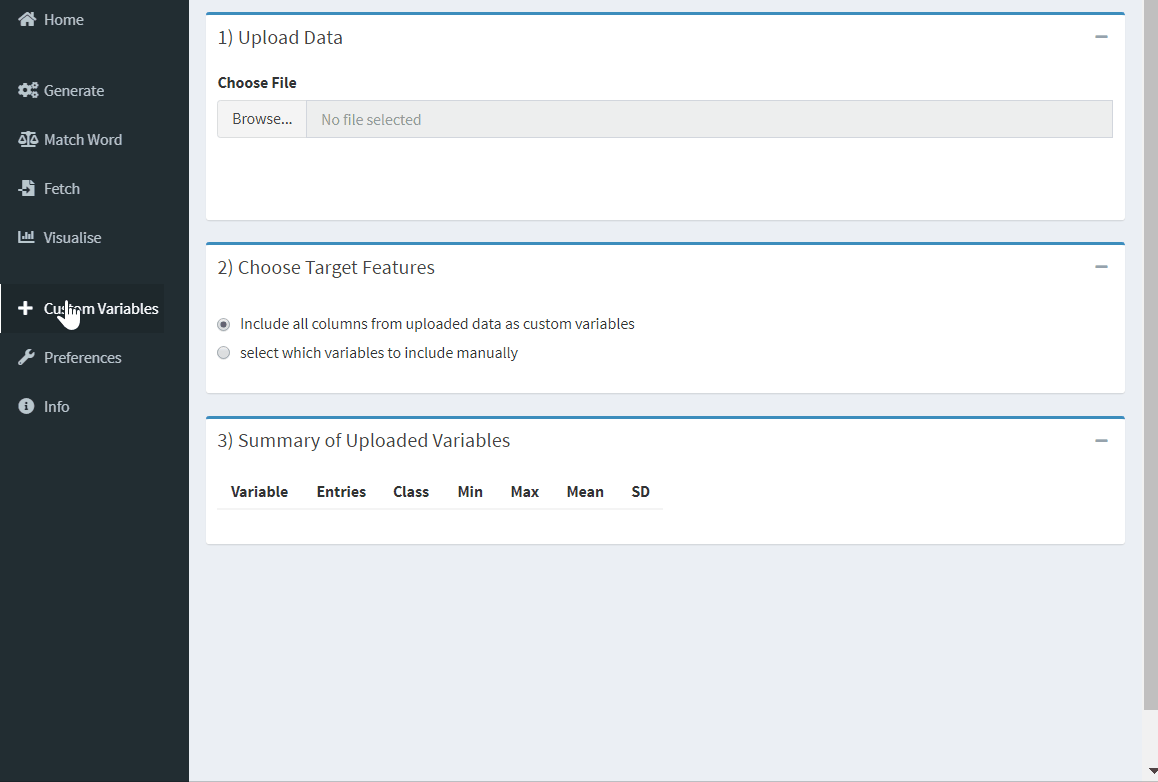
Figure 2.2: Using stimuli for languages other than English.
The Custom Variables tab uses dplyr’s join functions. An equivalent to using custom variables in R code would be to either join the custom variables to the LexOPS dataset using dplyr’s join functions, or to just run the generate pipeline on a dataframe of custom variables (see this section for an example).
5.6 Random Seeds
The seed can be set in the Preferences tab to reproduce specific lists of generated stimuli. This means that the exact same list of words will be generated each time you click “Regenerate”.
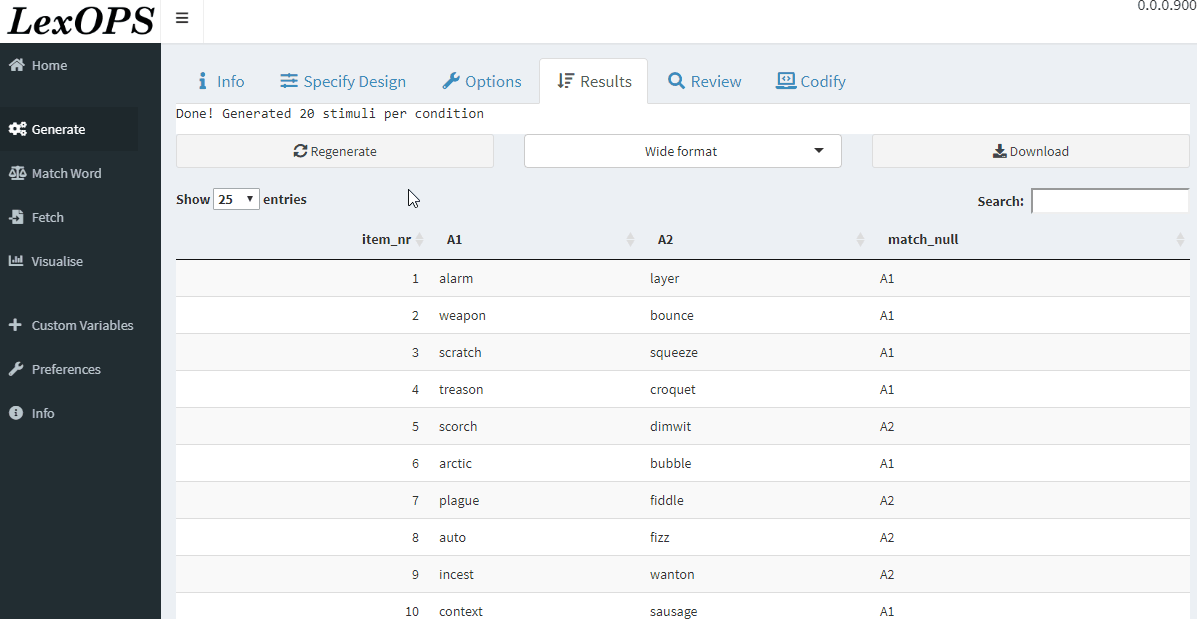
Figure 5.7: Setting the seed in the Shiny app.
If you “codify” your selected options, the generated code will also set the seed as the same value, so that a stimulus list can be reproduced outside of the shiny app.
Note that in order to reproduce stimulus lists generated with R code
within the shiny app, the seed should be set using the seed
argument of the generate() and split_random()
functions. See this
section on random seeds in the generate pipeline for some
examples.